Here are technical and physical setup instructions for the installation Between. Read this if you want to exhibit Between in your space. Please contact the artist, Claire Kwong, if you have any questions or comments.
Main page for the artwork: Between
Equipment
This is a list of common equipment for all installs of Between. Specific mounting equipment depends on the mounting method, described in sections below.
The links are all suggested models. Different models can be used.
To Borrow
I would need to borrow this equipment from the venue, unless the exhibition is local in NYC.
- Short throw projector that can project on the floor
- Suggested models:
To Borrow or Bring
I can bring this equipment with me, though it would be ideal if I could borrow it from the venue.
- MacBook Pro (or other computer) running Xcode with OpenFrameworks installed
- Suggested Xcode version: 15.4, though it has run on 13.1
- Suggested OpenFrameworks version: 12.0, though it has run on 11.0
- OpenFrameworks download: https://openframeworks.cc/download/
- Projector surface or screen (6′ by 8′) (182 x 244 cm)
- Optional – only need this if the projection doesn’t show up well on the floor
- Tape
- Cable zip ties
To Bring
This equipment is specific and I can bring it myself.
- Xbox Kinect v1 1414
- Power adapters (US, UK, or EU)
- 2 seat cushions
Projector and Kinect Mounting Methods
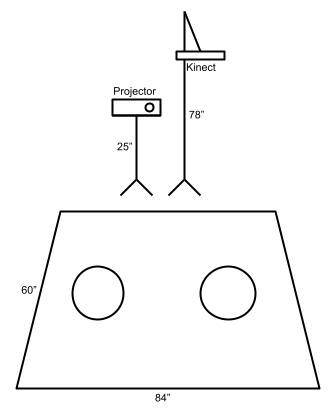
You’ll need to mount the projector and Kinect so that the projector can project a roughly 6 by 8 feet (182 x 244 cm) image on the floor, and the Kinect camera can capture the full image play area. I’ve done this multiple ways.
Truss or Ceiling
If the space allows it, this is the best mounting method to minimize shadows and maximize floor space.
Instructions
Mount the projector and Kinect so that both point downwards toward the center of the play area. The projection should be roughly 6 by 8 feet (182 x 244 cm). The Kinect should capture the full play area, with some margins.
The projector and Kinect should be minimum 6.5 feet and maximum 12 feet high (200 to 365 cm) above the ground.
Tripod Stands
This method is best if the space doesn’t have a ceiling or truss to mount the projector and Kinect from. It works best with an ultra short throw projector.
Instructions
Equipment
If the projector can’t point down, you can also mount a mirror to point the image onto the floor.
To Borrow or Bring
I can bring all of the following if the exhibition is local in NYC:
- Stand for Kinect, minimum 6.5 feet (200 cm) and maximum 12 feet (365 cm)
- Stand with surface for projector – about 24 inches high (60 cm) works with ultra short throw projector
To Bring
I can bring this to attach to any tripod stand:
- Extension arm for Kinect
- Mirror to attach to projector (optional)
- Binder clips
- String
Installation
Projector Setup
- Place one shorter tripod stand at the back of the projection surface. This stand should be about 24 inches (60 cm) tall, but this will change depending on the projector.
- Place the projector on the tripod stand.
- Connect the projector to your laptop and to a power source.
- Turn on the projector. Calibrate it so that the projector image matches the dimensions of the physical surface.
Kinect Setup
- Attach the Kinect to the tripod arm with zip ties. The Kinect will be pointing downwards at an angle, pointing towards the floor.
- Place the other taller tripod stand at the back of the projection surface, to the right of the other tripod. The projector lens should be as aligned with the Kinect dual depth cameras as possible.
- Attach the tripod arm (with the Kinect) to the top of this tripod.
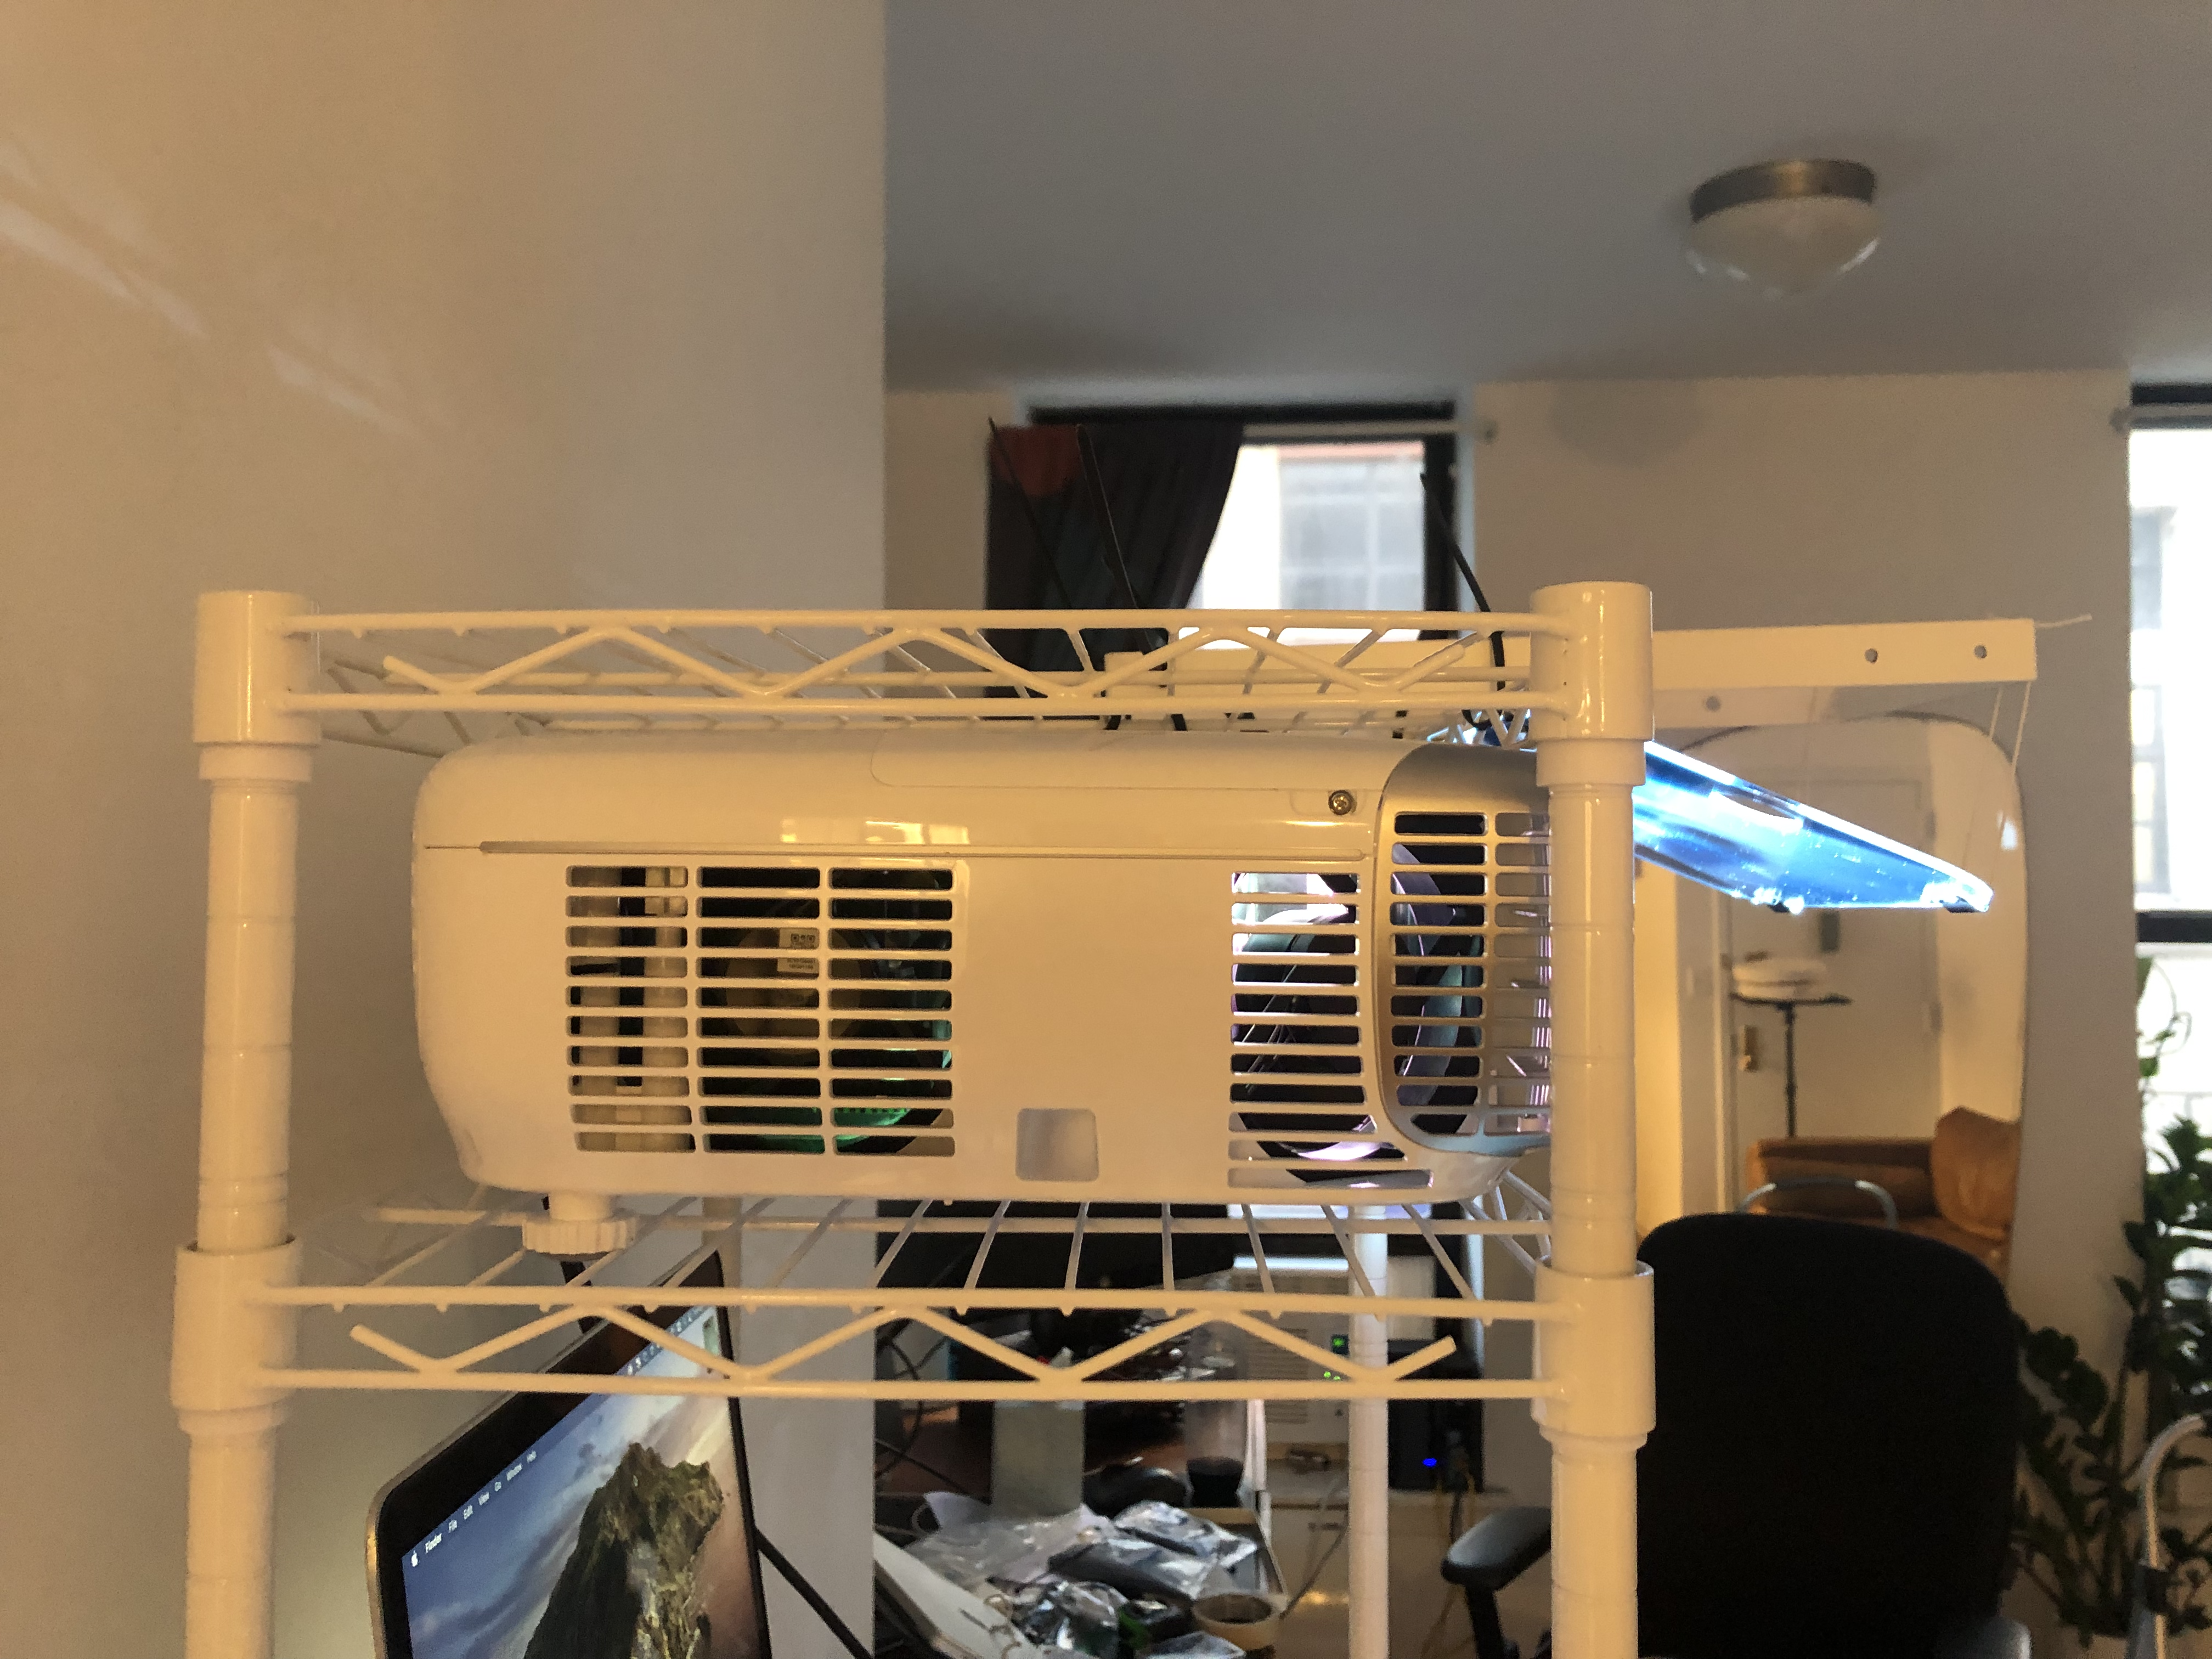
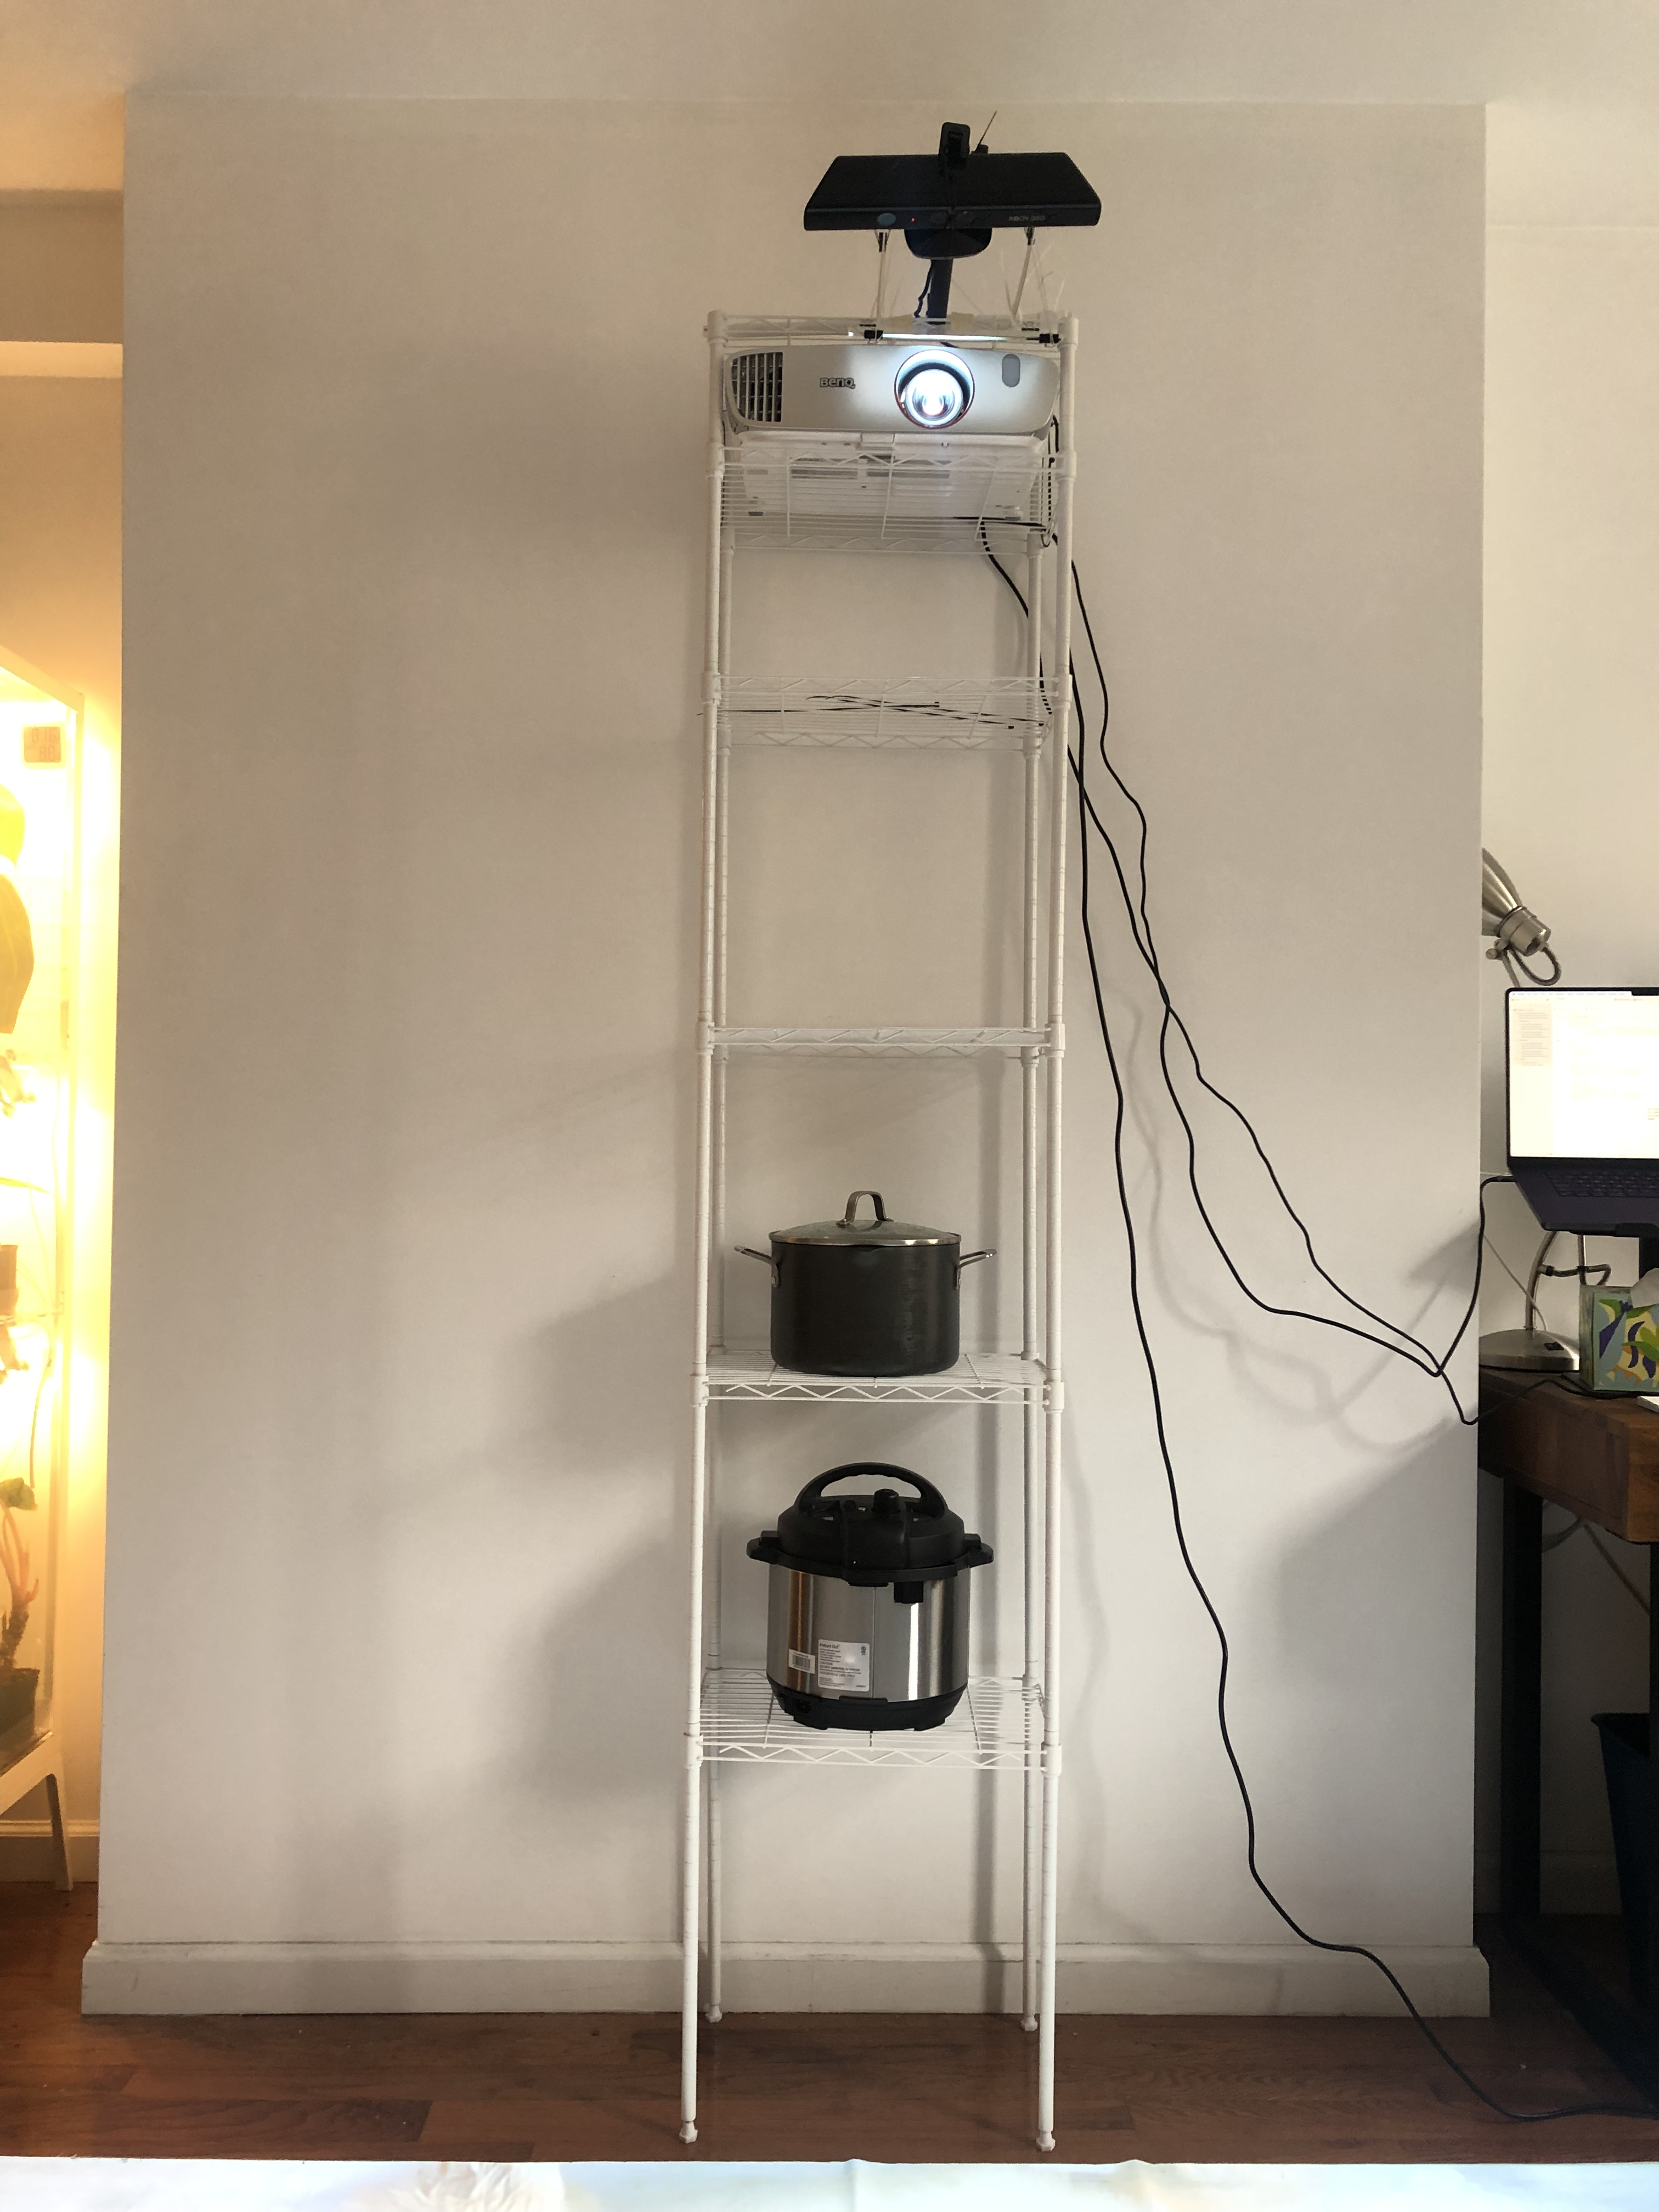
Shelf
This is the method I use at home. I have all of this equipment and can bring it if the exhibition is local in NYC. The following instructions are mostly for my own reference.
Instructions
Equipment
- 2x wire shelves
- Mirror
- Binder clips
- String
- Extension arm for Kinect
- Ikea Variera wide leg
Installation
Shelf Setup
- Assemble the shelf so that it’s 5 rods high. It should be about 6’6″ high. Put a shelf on each rod for stability. Don’t put the top shelf on yet.
- Put the second-top shelf on. There should be enough space on top to put the projector, and then put the top shelf on.
- Put the projector on this shelf.
- Put the top shelf on.
- Mark the left and right edges of where the projector lens are with tape.
- Take the top shelf off.
- Put a heavy counterweight on the bottom shelf.
Projector Setup
- Attach a long Variera stand leg to top shelf with zip ties where the projector lens is. This will be to hang the mirror.
- Attach the mirror. Attach 4 binder clips to each corner of the mirror.
- Attach 2 binder clips to each side of the outer edge of the Variera stand leg.
- Attach the binder clips that are close to the shelf to the shelf with zip ties.
- Attach string from the outer binder clips on the mirror to the binder clips on the Variera stand leg. The string should be long, and not exact.
Kinect Setup
- Attach the Kinect arm to the top shelf.
- Clip the Kinect arm around a spare shelf rod. You can use some padding tape to keep it in place.
- Attach the shelf rod horizontally on the top shelf with zip ties.
- Position the Kinect arm so that it’s in the middle of the Variera leg / projection lens.
- Attach the Kinect to the other side of the Kinect arm. I’ve used various screw-on attachments and zip ties.

Final Shelf Assembly
- Attach the shelf + mirror + Kinect setup to the top of the shelf. Be careful!
- Attach the top shelf to the second-top shelf with zip ties to keep it secure.
- Test the projection. Turn the projector on. Angle the mirror and adjust the strings so that the floor projection is as big as possible.
- Adjust the projection keystone so that it’s as rectangular as possible.
- From the computer, flip the external display 180 degrees.
- Start Between from your computer. Press 1 on your keyboard to view the camera.
- Adjust the Kinect angle until it captures as much of the playing surface as possible.
Common Installation Instructions
Follow these common instructions regardless of your projection and Kinect mounting setup.
Laptop Setup
- Connect the laptop to a power source.
- Connect the projector to your laptop.
- Connect the Kinect to your laptop via USB (with an extension cord if needed, though USB extension cords can increase the chance of Kinect frame drop).
- Connect the Kinect to a power source. Use the correct power adapter for the country, or use a step-down adapter, to provide the correct voltage to the Kinect.
Surface Setup
If the projection can’t be seen well on the floor, lay out a surface.
- Lay out a white or gray surface. This surface should be approximately 6 by 8 feet (182 x 244 cm) , but it can vary.
- Ideally, people should be able to walk with shoes onto the surface and not leave marks. Carpet works well for this, and gray can work better than white to mask stains.
- Make sure the surface lays flat even if people step on it. For one exhibition, I made the surface soft by covering a rug with a projector screen.
Final Setup
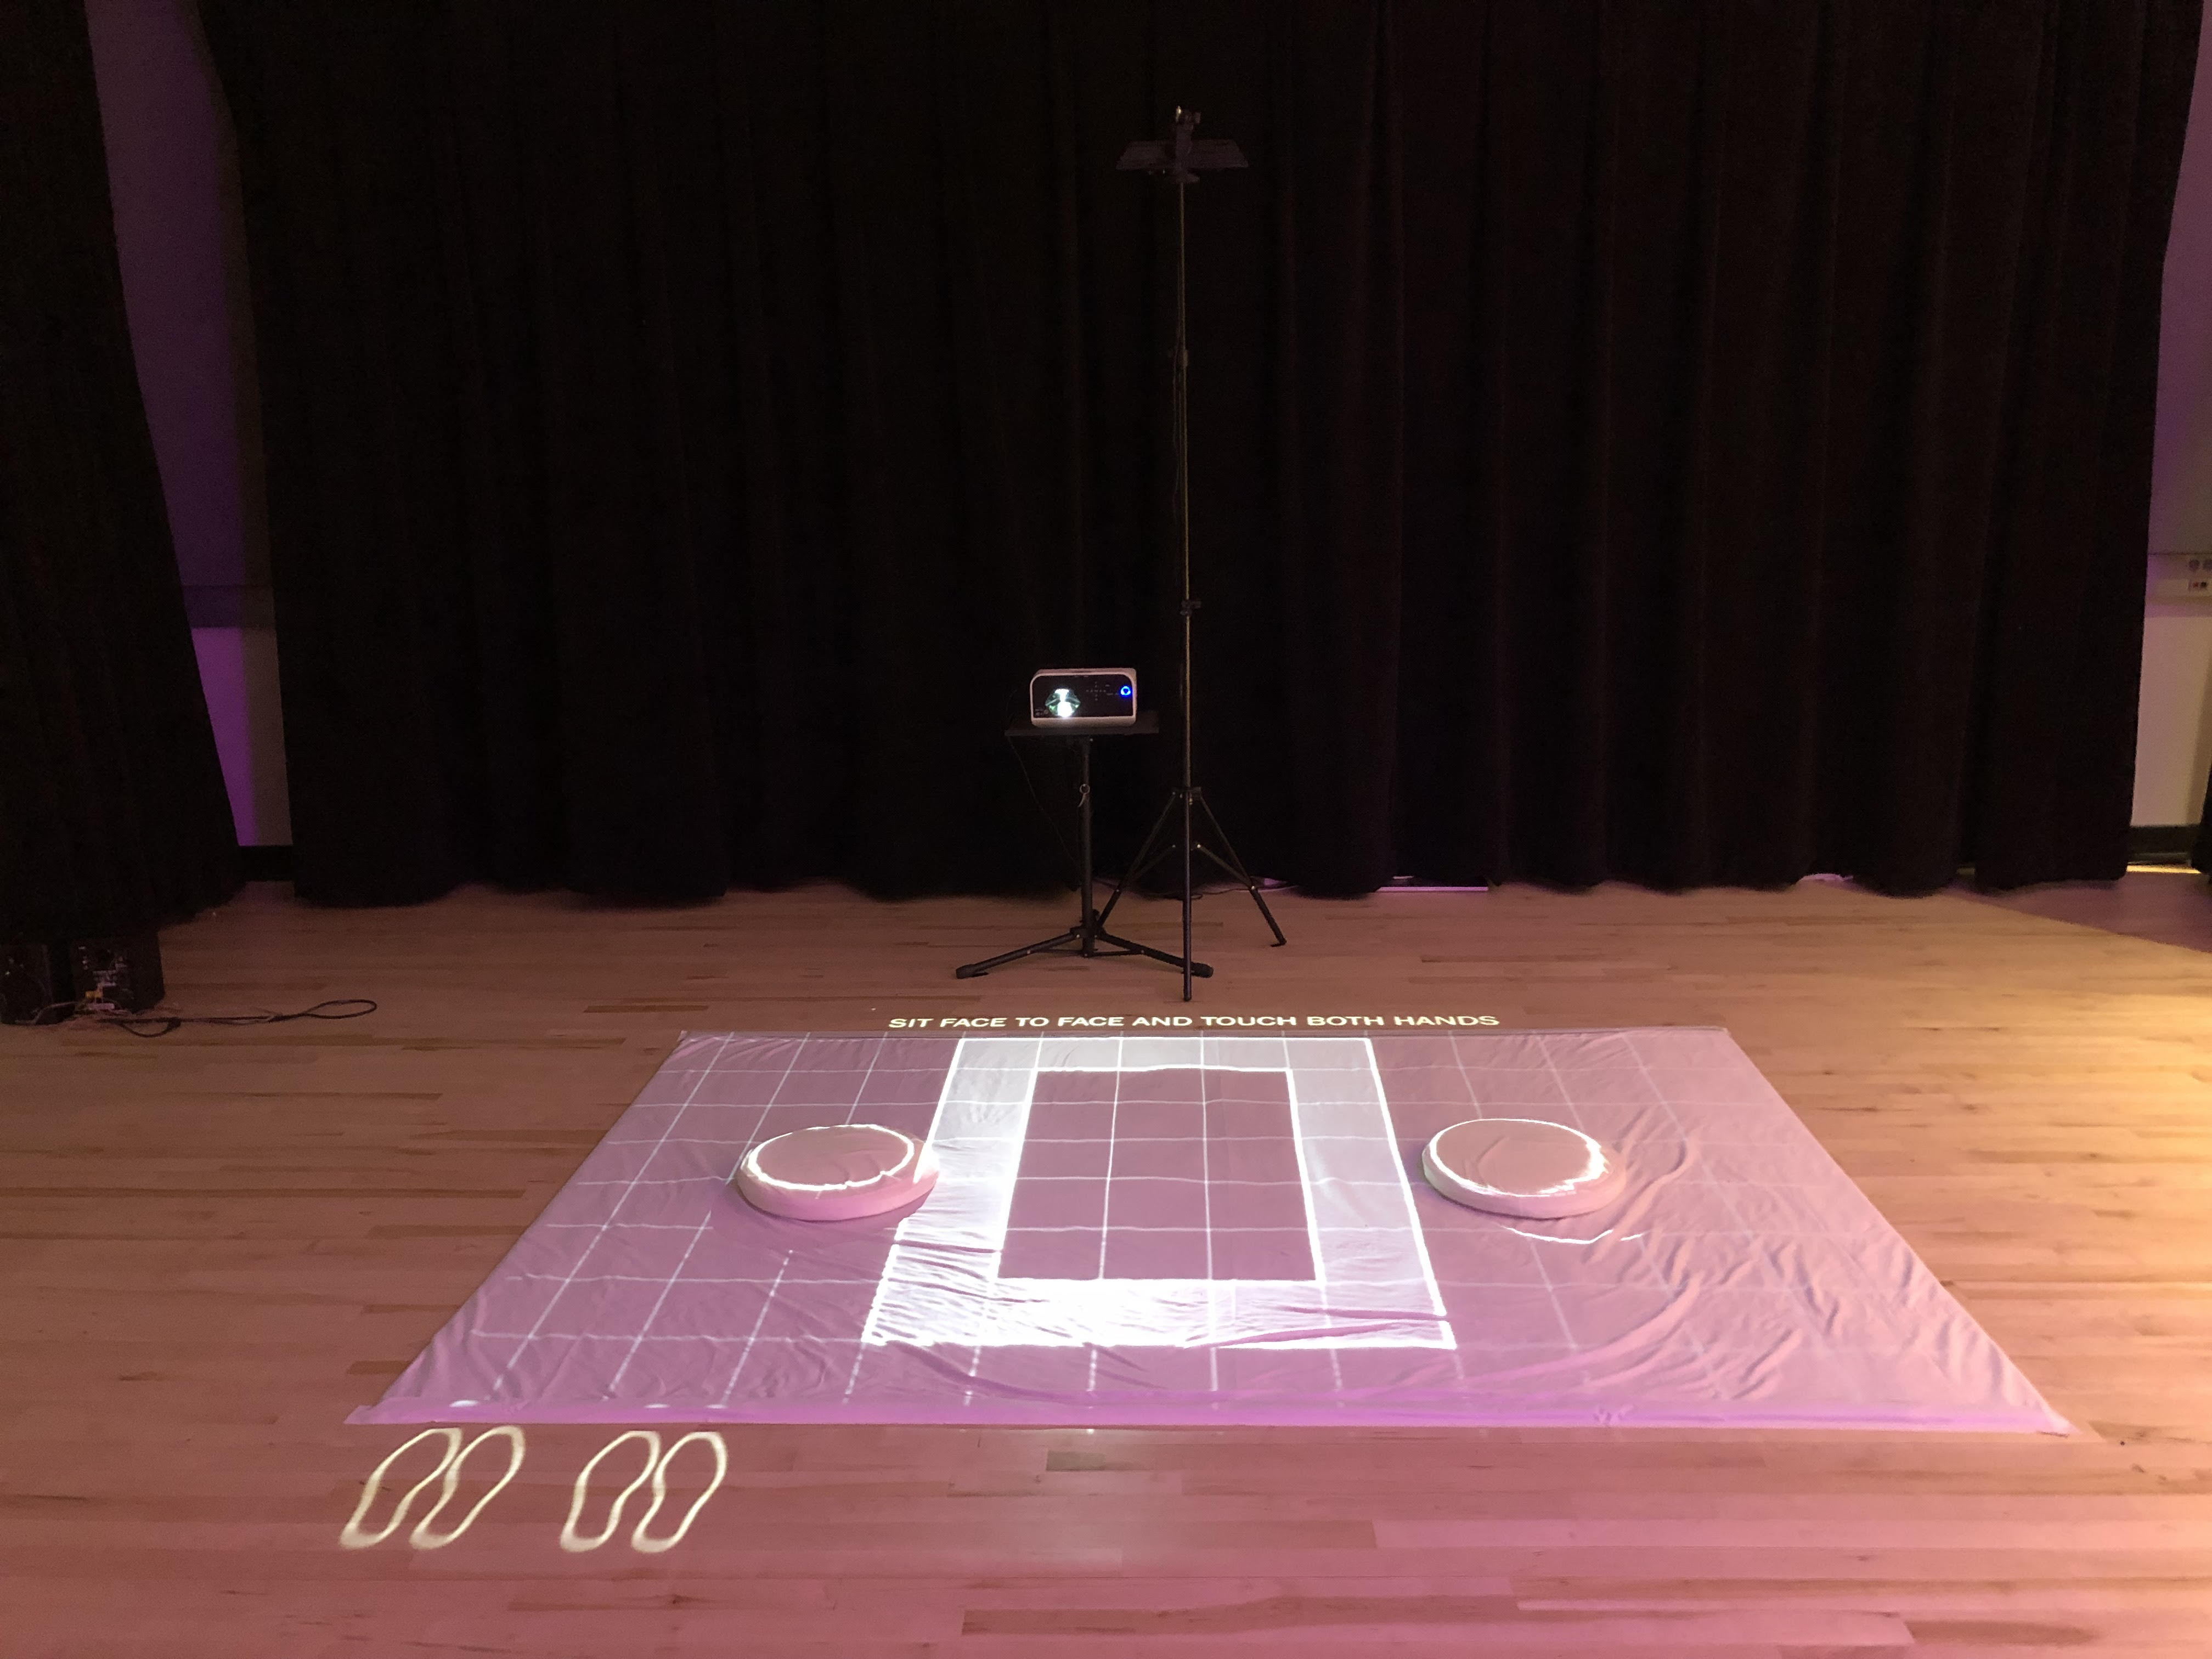
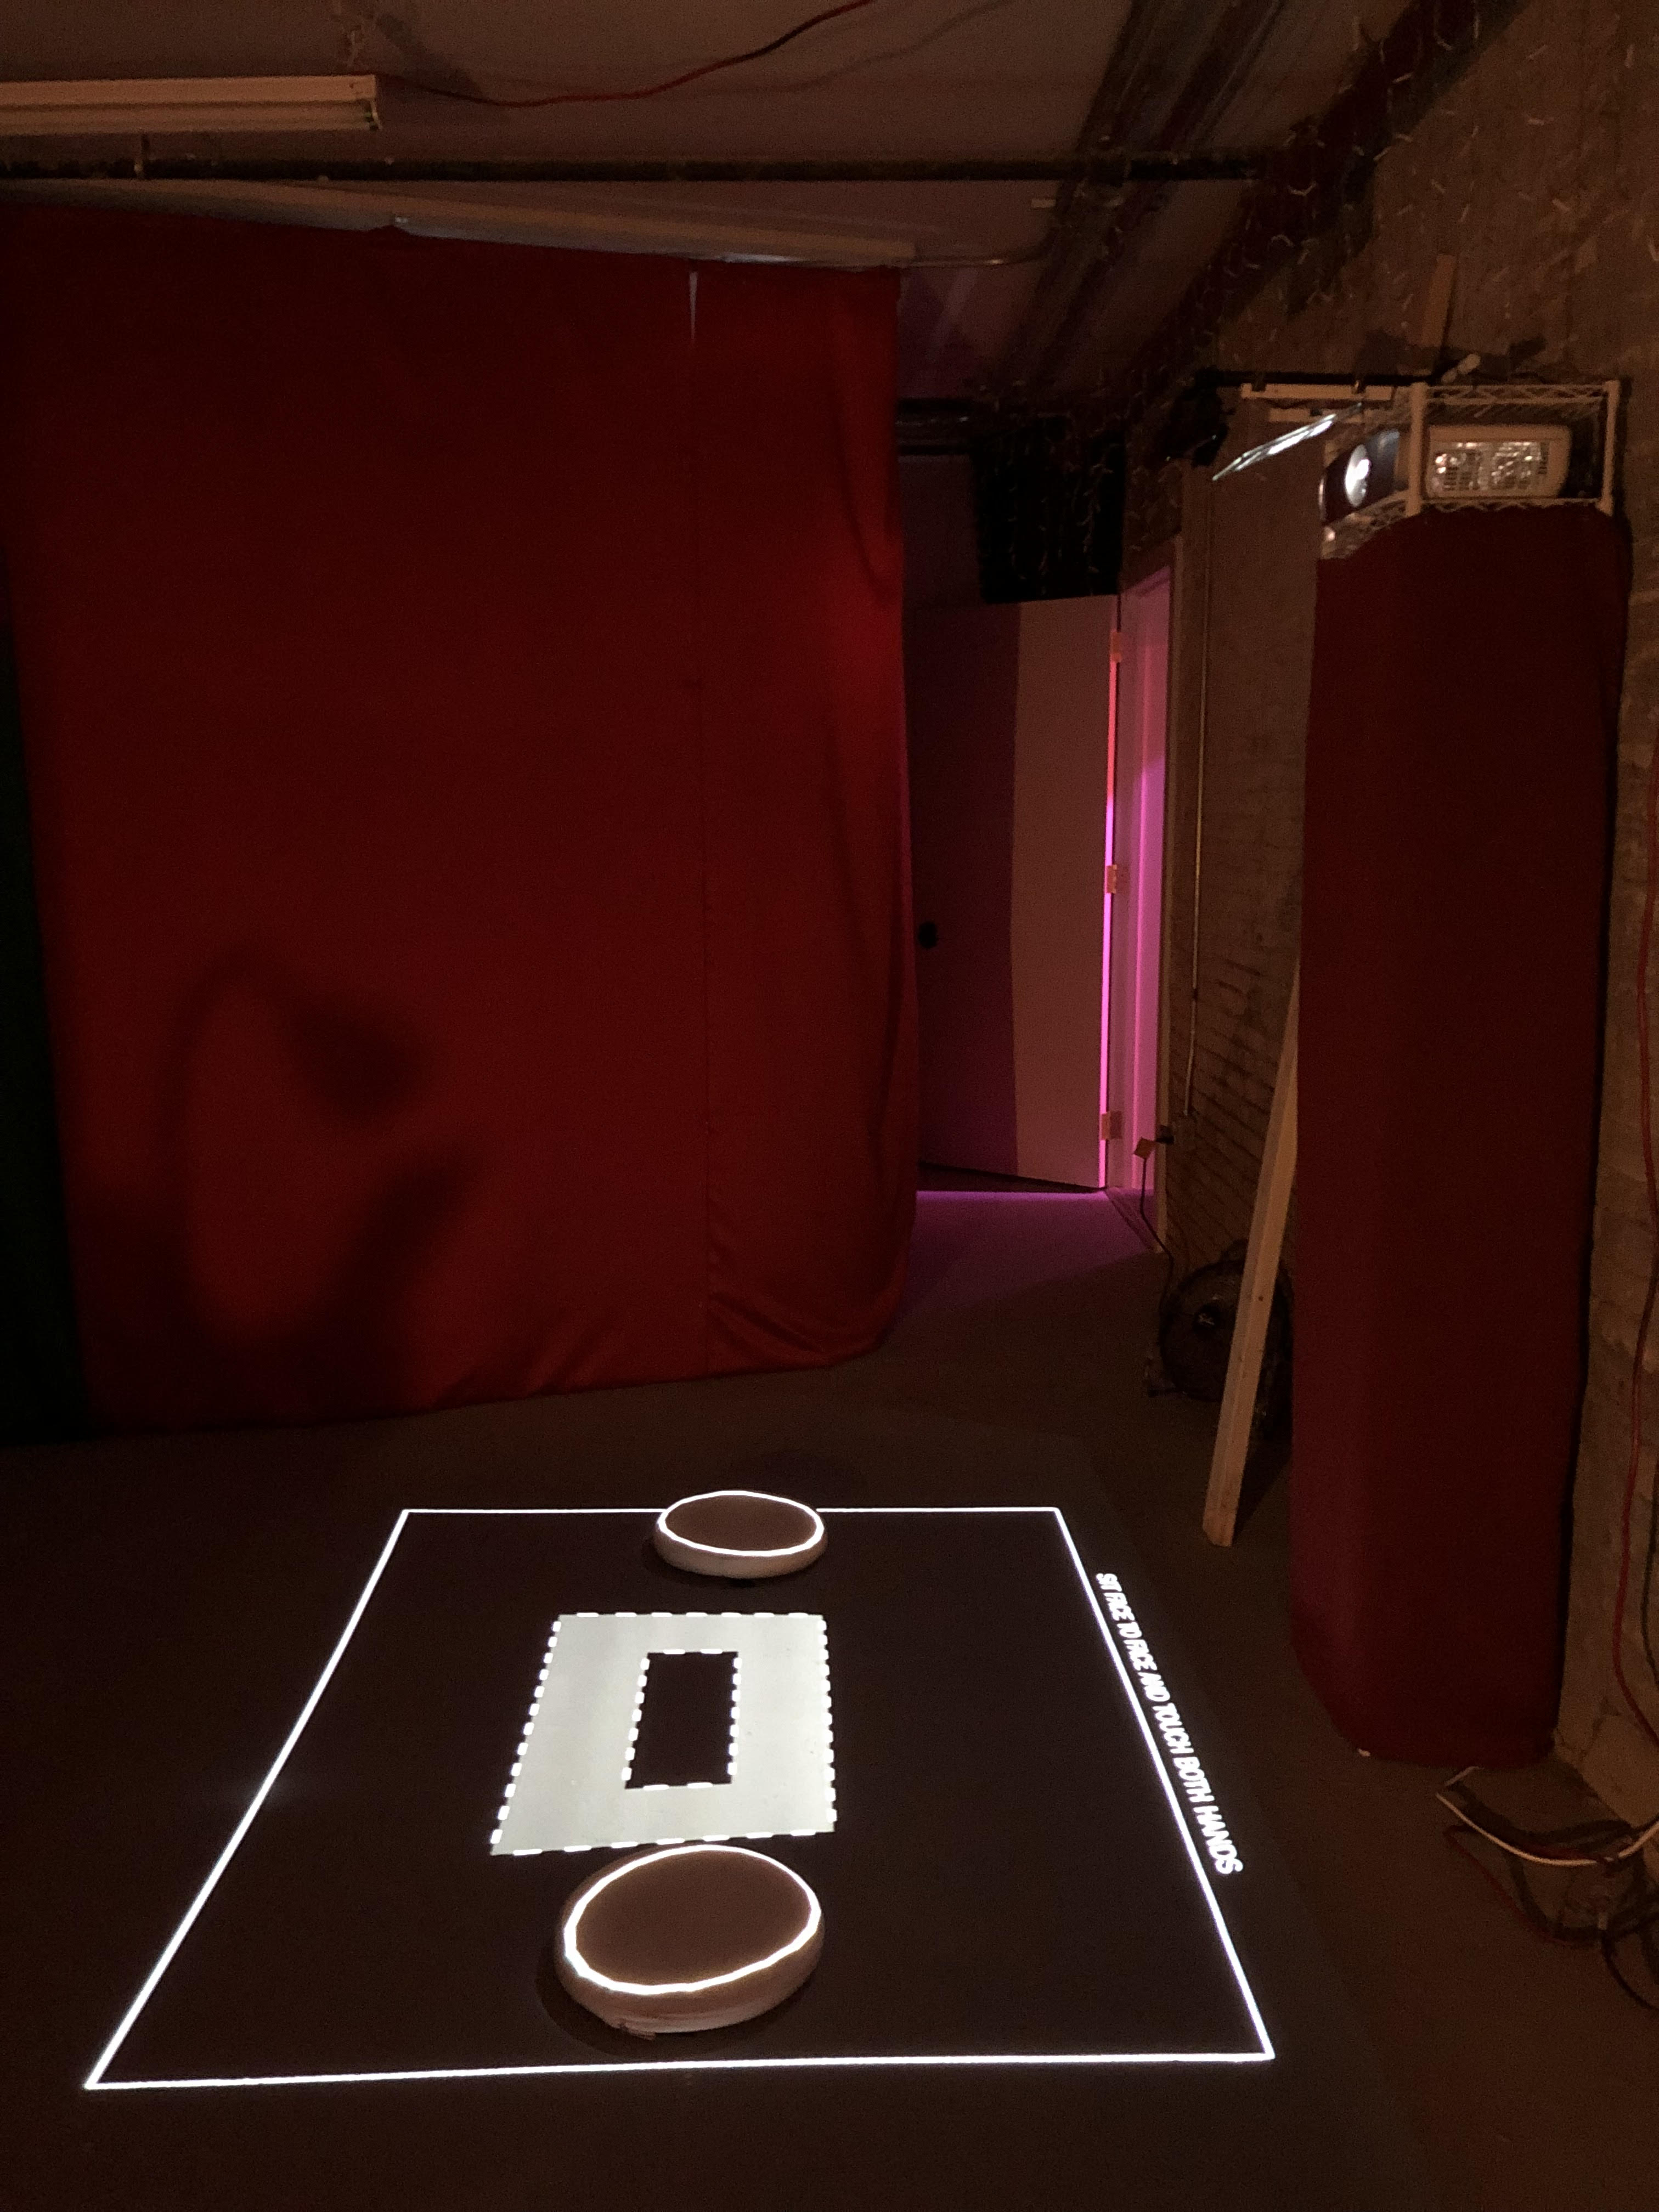
- Place the two cushions centered and roughly 32 inches (81 cm) apart.
- Run the program in OpenFrameworks. Calibrate the Kinect so that its camera covers the entire play and projection surface.
- Calibrate the application so that the projected shapes align with people sitting on the floor – see below for calibration instructions.
Calibration

The Kinect’s contours should detect the outline of a person. Test this by having people sit on the projection surface. Calibrate the near and far thresholds in the GUI.
The silhouettes that project onto the floor should roughly align with a person’s body. Calibrate the ROI and FBO positions.
While the application is running, you can press 1, 2, 3, and 4 on your keyboards to toggle between: video, depth, threshold, and contour images.
These are the relevant parameters you can control in the app’s GUI:
Parameters

- ROI X, Y, W, H: Region of interest. This is the region that the Kinect will detect silhouettes in.
- Bounds X, Y, W, H: Bounds of the play area (grid).
- Right, left bounds diff: Adjust the corners of the bounds if the projection is not straight.
- Min, max blob area: The min/max of what should be considered a person
- Near, far threshold: Thresholds on either end at which the Kinect will detect an object. I have min and max near and far thresholds to account for if the Kinect is at the angle.
- Max blob num: Maximum number of blobs. This is currently set to 6, though I likely need less.
- Smoothing size, shape: Controls smoothing of silhouette
- Blur value: Controls blur. Must be an odd number.
- Blur threshold: Controls blur and increases/decreases size of silhouette.
- FBO left, top: The position of the entire video image.
- Shape FBO left, top: The position of the projected silhouettes. These are meant to align with peoples’ bodies.
- Shoes X, Y, scale, scale 2: Controls position of shoe outlines, if visible.
- Text X, X2, Y: Controls position of instruction text.
- X, Y offset: Controls offset of generated target rectangles.
- X, Y range: Controls range of generated target rectangles.
- Grid square size: Controls size of grid squares.
Player Manual
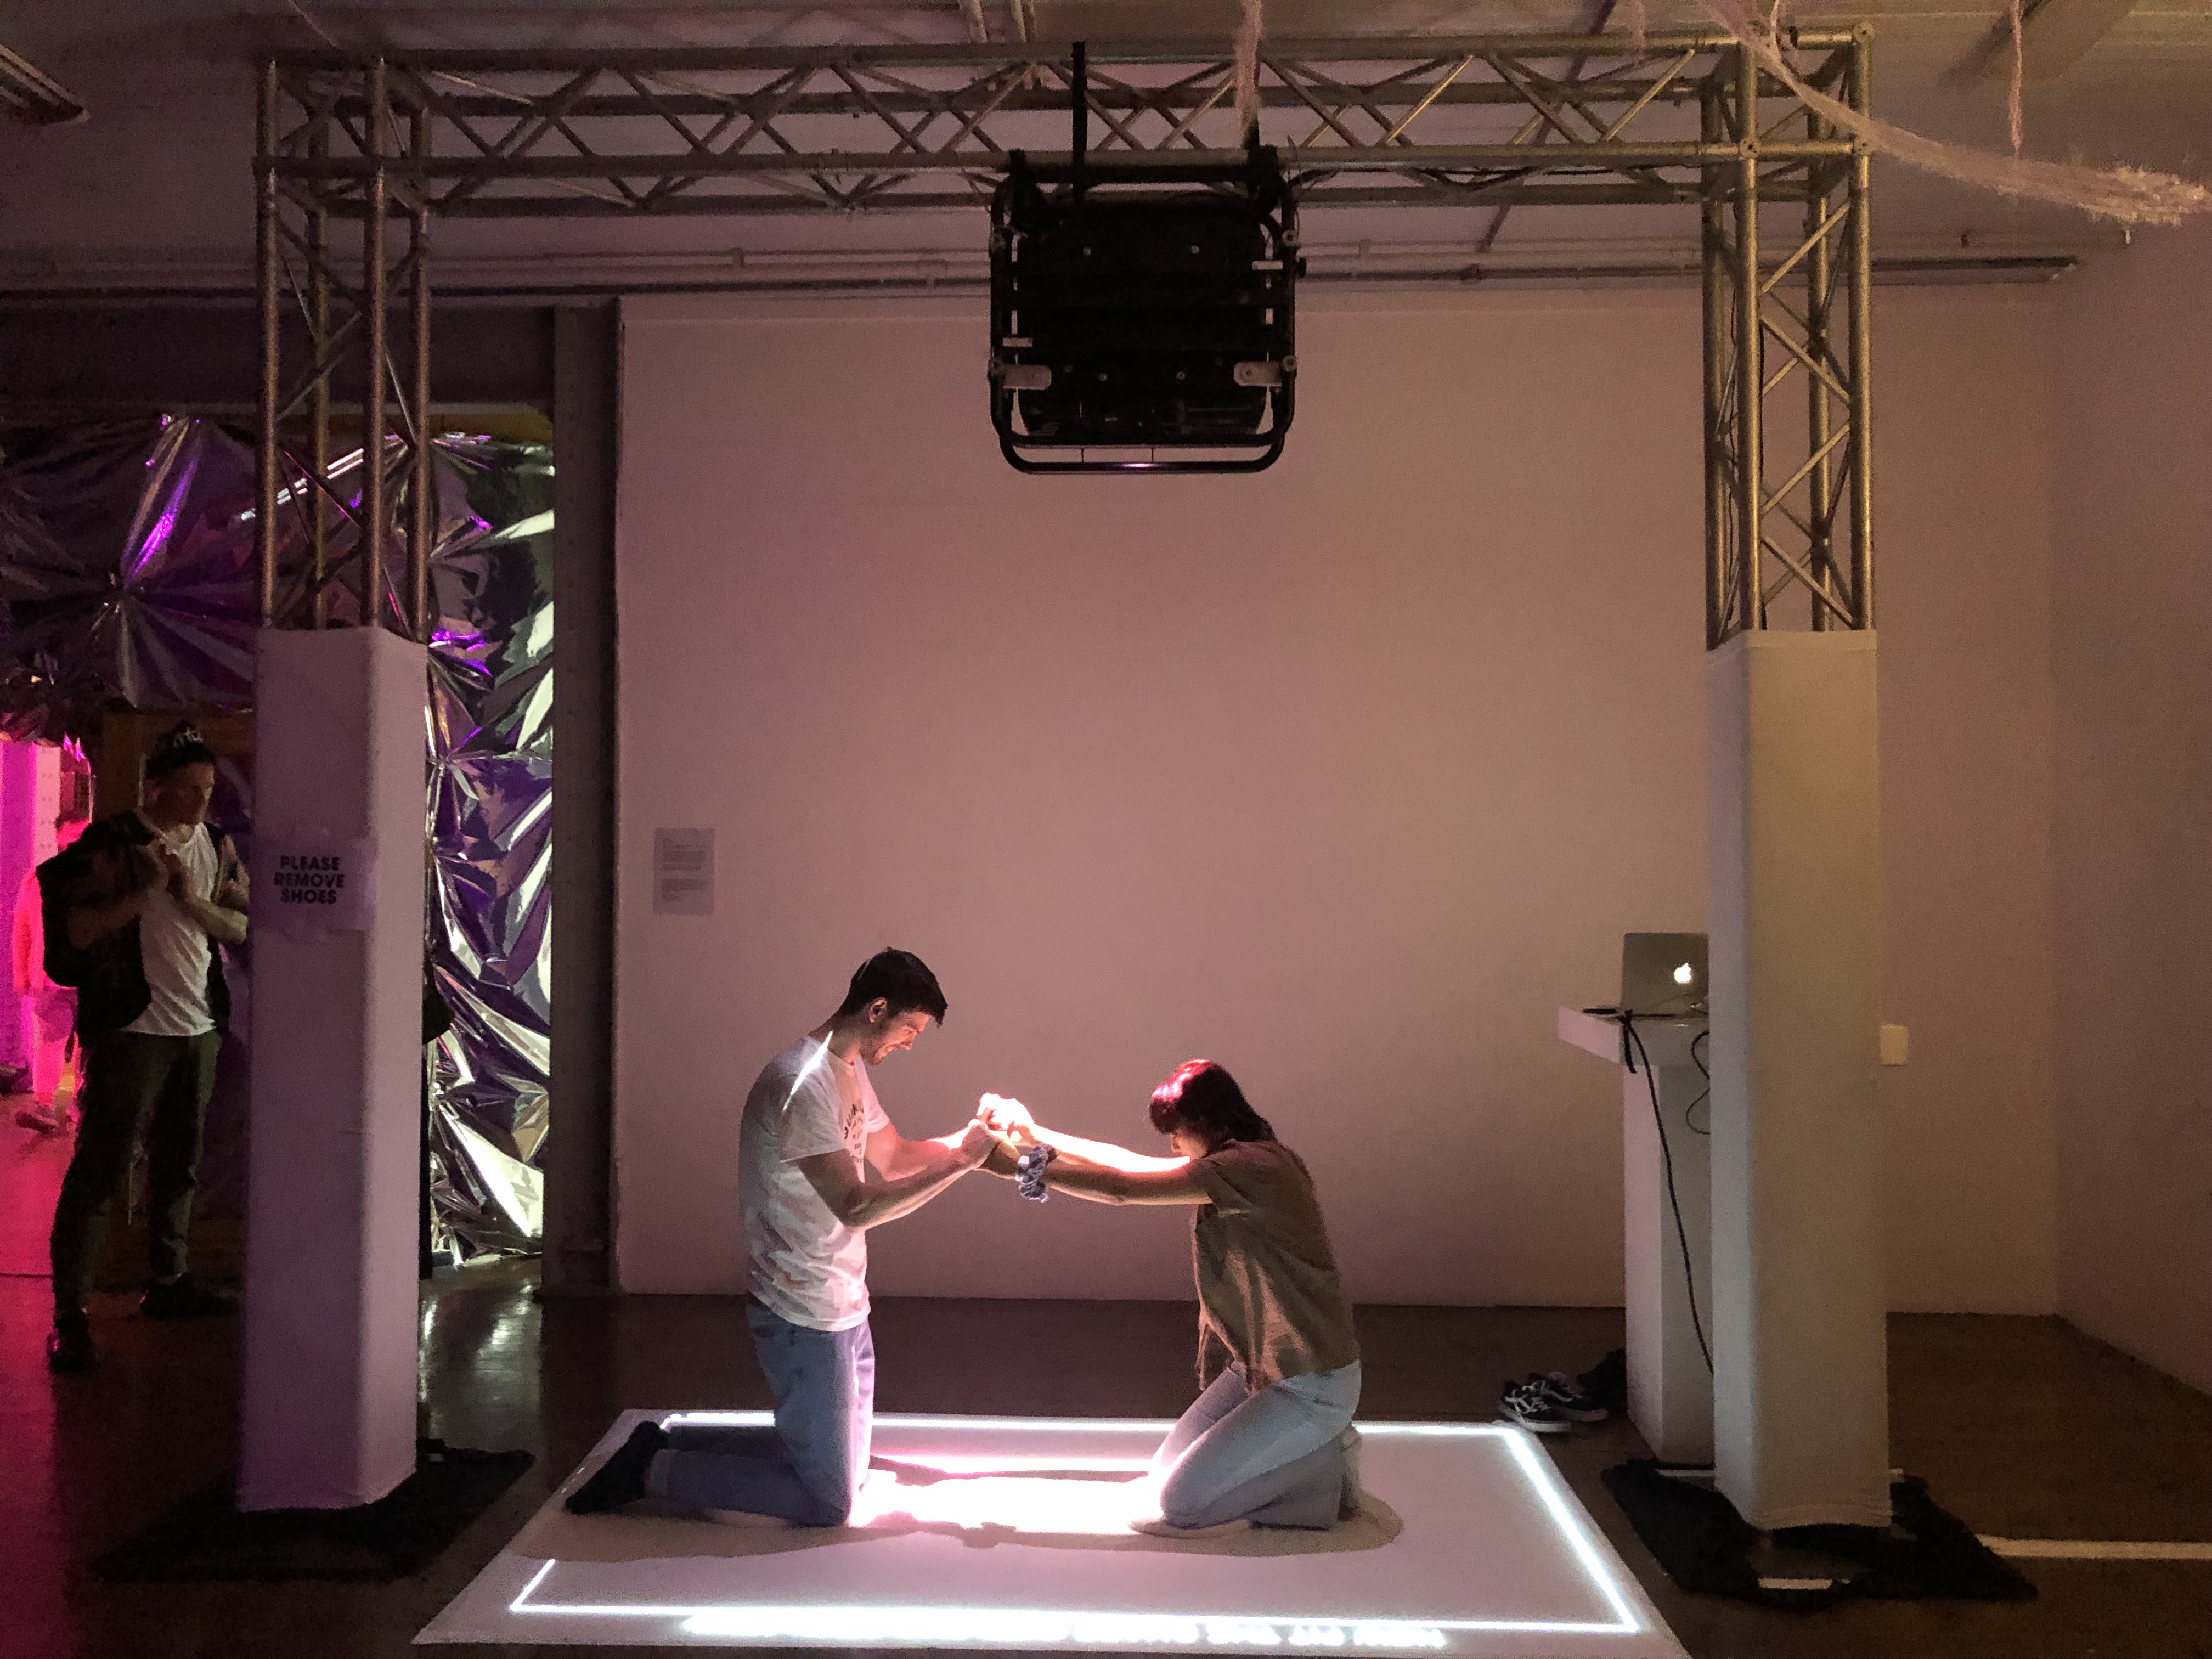
- Two players sit face to face to face on the cushions. (They can move the cushions.)
- They hold both hands to create a geometric shape between them.
- They must move their arms to guide this shape to fill outlines on the floor. Each outline is a rectangle with an inner and outer bound. The shape’s visible bounding box must fall within these bounds.
- When they fit the target outline, a new target outline appears. They must move their arms again to fit this new target.